making music in the shell -- with Soundb0ard
Damn. What a rabbit hole! Live Coding. I’ve never been into this too much in the past, but currently I have read this nice interview from Cycling74 with Thorsten Sideboard.
…and then I stumbled across this video of him. Hell yes, what a cool dude!

…and an awesome performance with his handcrafted live coding platform Soundb0ard. A treasure and all open-source. 🔥
I wanted to try it out immediately. Here are my steps.
Building and running Soundb0ard
First clone
git clone git@github.com:sideb0ard/SoundB0ard.git
My steps on my Mac OS system were:
Install some libraries
PortAudio
http://www.portaudio.com/download.html
./configure --disable-mac-universal && make
make install
This is the only library I installed without using brew. I thought this would be fun, but brew is so much less pain:
brew install portaudio
PortMidi
http://portmedia.sourceforge.net/portmidi/
brew install portmidi
libsndfile
http://www.mega-nerd.com/libsndfile/
brew install libsndfile
ctags
brew install ctags
cscope
http://cscope.sourceforge.net/
brew install cscope
liblo
brew install liblo
readline
brew install readline
Ableton Link
Clone Link from https://github.com/ableton/link
| |
Range-v3
https://github.com/ericniebler/range-v3
Googletest
https://github.com/google/googletest
Google Performance Tools
https://github.com/gperftools/gperftools
brew install gperftools
Update CMakeLists.txt
mkdir -p cmake wget -O cmake/CPM.cmake https://github.com/cpm-cmake/CPM.cmake/releases/latest/download/get_cpm.cmake
Update the Makefile
There are some path settings which needs to be changed in the Makefile.
| |
These are of course specific to my current system.
make it
…and then a simple make is enough to build the application.
$ make
$ Boom! make some noise...
Good point. Lets try it out.
How to play with it
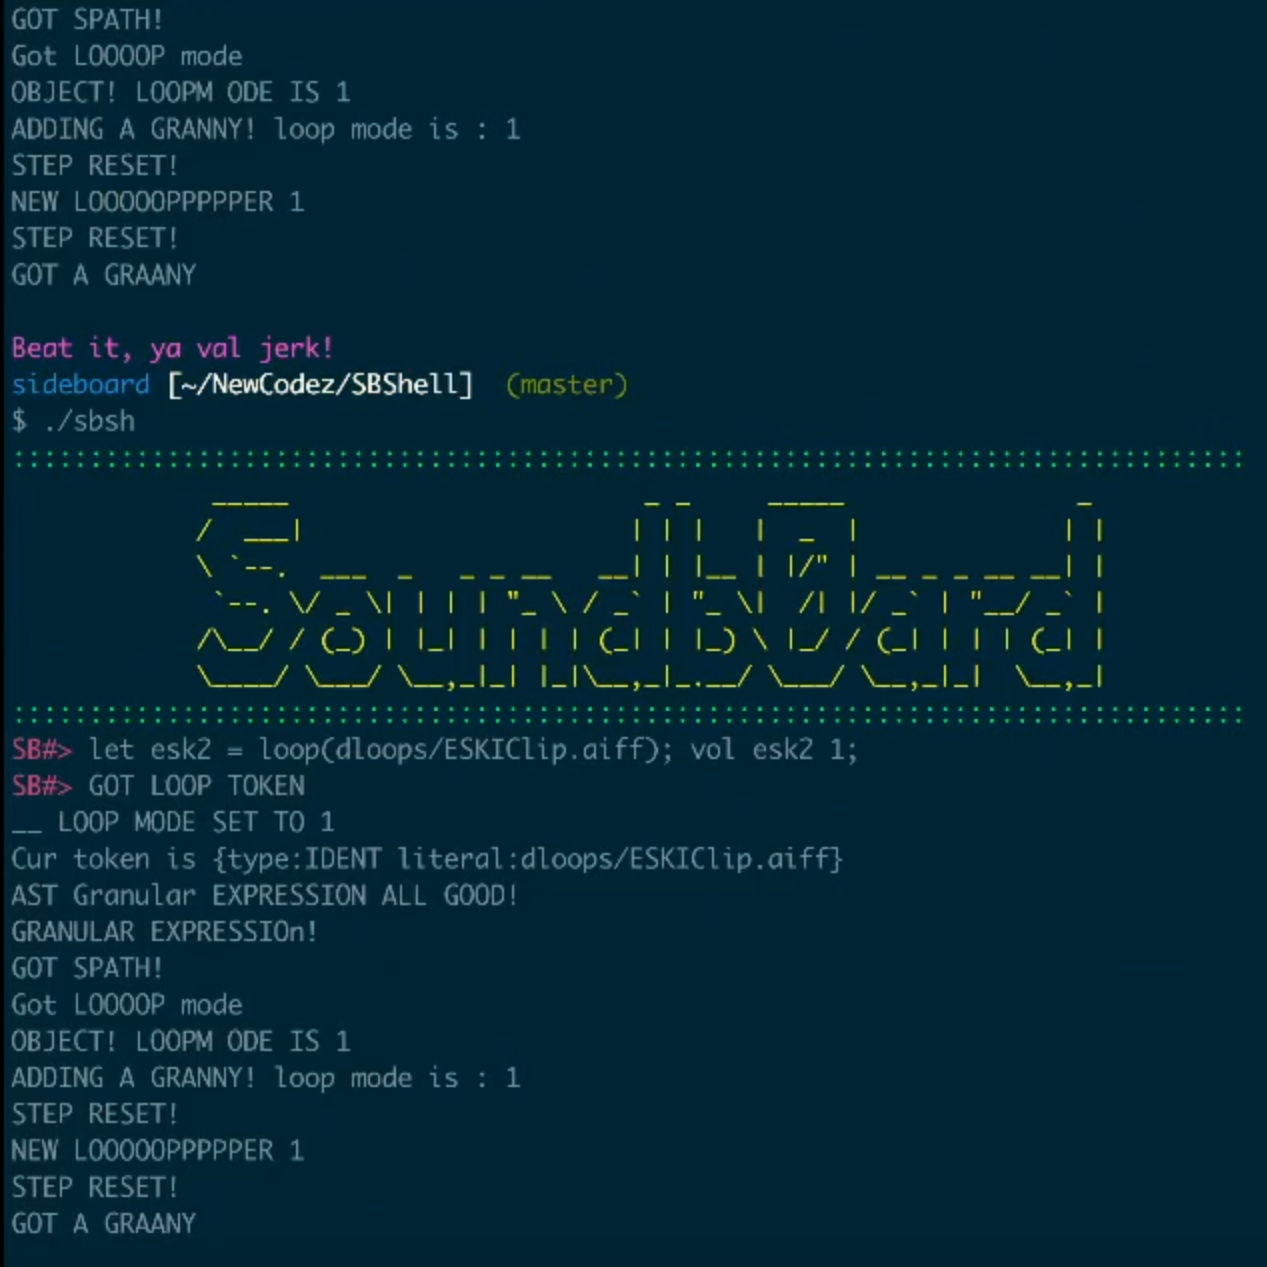
You can start the shell by running ./sbsh from the command line and you are presented a nice colorful intro screen:

I want to collect some infos about the commands and keyboard shortcuts. I haven’t found a full documentation yet, but try to figure some stuff by playing around.
WORK IN PROGRESS
keyboard shortcuts
- control + D : Exit soundb0ard shell
shell commands
ps: show running processes with instruments and algorithmsls: list samples inwavs/folder
Looping a sample
| |
VEH4-24.wav is in this case a wav file I put into the wavs/loops/ folder.
Setting BPM
| |
Loading and playing a sample
Trying to play a simple kick.
| |
Play it using a pattern
| |
it seems that you can have up to 99 pattern (p1 - p99).
Adding effects to a loop
| |
With addFx you can add couple of effects:
bitcrushcompressordelay(default delay 200ms)filterreverbsidechainmoddelaymodfilterwaveshape
sidechain requires a second argument, which defines the trigger signal used for sidechaining (What is sidechaing? See this nice article by Ableton). For example a kick:
| |
Set volume of a track
You can set the volume to a track with a value range of [0.0, 1.0]
| |
Modify the looper loops
In the examples above I have used the looper using the loop command.
The looper allows some modifications:
active:set l1:active 0to deactivate andset l1:active 1to activatepitchmodegate_modeidxlenscamblestutterstepreversegrain_dur_msgrains_per_secdensity_dur_syncquasi_grain_fudgefill_factorgrain_spray_msselection_modeenv_mode
The Moog MiniSynth
There is this minisynth included callled moog. And there are a bunch of presets already included in the file moogpresets.dat which can be loaded using loadPreset:
| |
Presets include e.g.
sharpiewifflerumbllrrSQR2androidDreams
For a full list take a look on the .dat file.
with # instead of $ you can send MIDI notes to the device:
| |
Pattern
This is currently the most confusing part on my side.
| |
[]: pattern group<>: multi step pattern(): setting euclidian rhythm e.g. ((3,8),(5,13))$: prepending this allows you to access values from the[Env]environment – like your loaded samples etc.#: this allows you to work with values and assign it to a target (e.g. sending MIDI notes to a synth)
…only the beginning. Will continue to add more infos when I am ready :)